



Gragas (Mid) (Gragas)
Gragas (Mid) vs Primary Opponents: Cooldown Windows & 1-Sec Decisions


Gragas (Mid)vsLocke
MID対ロック(またはLv1の殴り合いが強いメレー/アサシン)戦の最序盤Lv1〜2(Sloppy肉声:『I need to start Q man. Gragas can't play with E start. Fucking useless... And now I go W though』)
Lv1の継続戦闘が強い相手にはE(ボディ・スラム)スタートを厳禁とし、必ずLv1でQ(タル転がし)を取得して安全にミニオンとマナフローバンドを回収し、Lv2でW(飲み干す)を取ってダメージ軽減+パッシブ回復+Bluetooth Autoでトレード基盤を作る
Lv1でEを取得して安易に敵へ突っ込み、長いクールダウン中に一方的に殴り返されてLv1からウェーブに触れなくなる


Gragas (Mid)vsVladimir
MID対ブラッドミア戦の序盤(Sloppy肉声:『I like these runes: Sudden Impact and Scorch. Adds a lot of chip damage anytime you damage something』)
メイン魔道(嵐乗りの勇躍+追火)+サブ覇道(サドンインパクト)を選択し、ブラッドミアのQクールダウン中にEで踏み込んでサドンインパクトの確定ダメージ+追火+W強化AA(対象最大HP7%)を叩き込み、2ヒットだけで最大HP25%削りを達成して『嵐乗りの勇躍(MS+40%)』を起動し、強化Qを撃たせずに離脱する
火力ルーン無しで漫然とQだけを投げ合い、25%閾値に届かず嵐乗りの勇躍が発動しないままブラッドミアの強化Qで全快される


Gragas (Mid)vsOrianna
MID対オリアナ戦の最序盤(Lv1〜5)、オリアナがボール(Q+W)と通常攻撃でハラスしてくるレーニング局面
オリアナのボール設置位置から斜めに立ち位置を取り、ラストヒットとオリアナ本体を同時に巻き込む角度でQ(タル転がし)を投げ、被弾した分は12秒ごとのW+パッシブ回復で相殺してロストチャプター(1,200G)まで耐え抜く
ミニオンの真上に立ってオリアナのQ+Wをミニオンごと被弾し続け、Lv3でポーションが尽きてゾーニングされる


Gragas (Mid)vsAhri
MID対アーリ戦(07:04 / 09:23 / 10:14)、アーリがE(チャーム)を外した直後またはR(スピリットラッシュ)がクールダウン中の場面
アーリがチャームを空振りした瞬間、またはRのブリンクを使って前へ出た瞬間にE(またはE-Flash)で1.0秒スタンを入れ、アーリが次のRを押す前に0.55秒着弾のRで自陣側へ吹き飛ばしてキルを量産する
アーリにチャームが残っているのに正面からEで突っ込み、空中でチャームに止められて一方的に殴られる
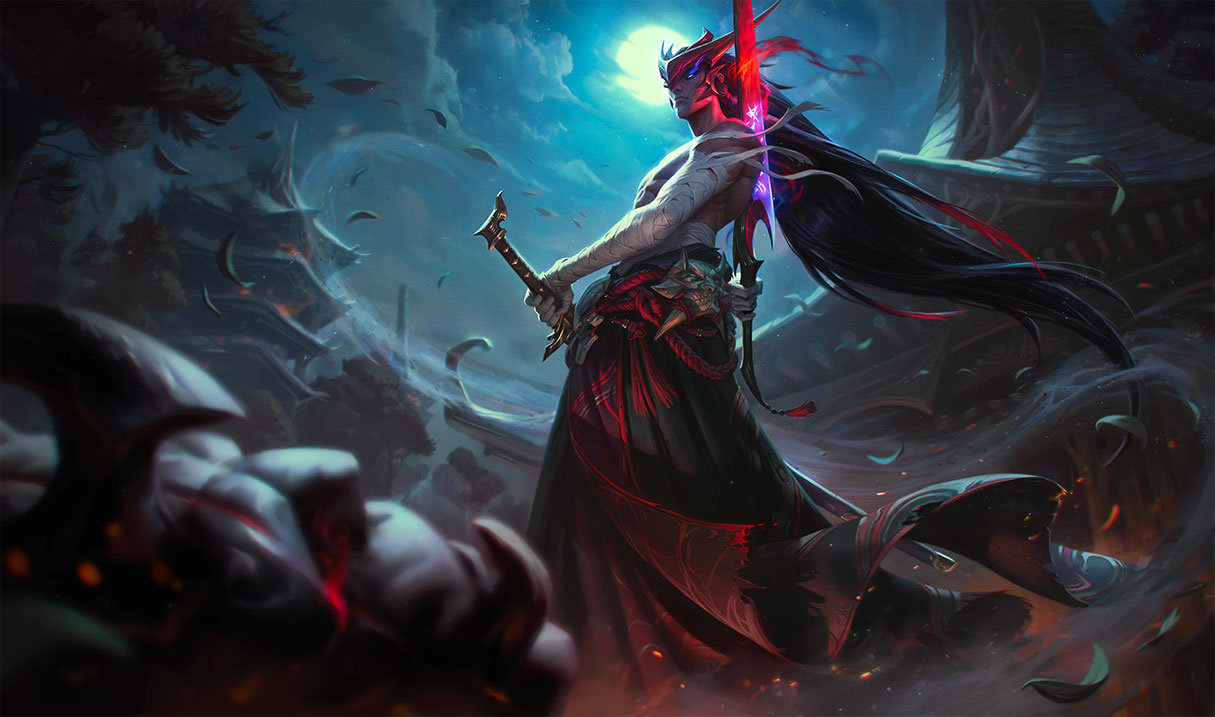

Gragas (Mid)vsYone
MID対ヨネ戦(08:55)、序盤にキルを持ったヨネが自陣MIDタワー前まで強気にプッシュしてきた場面
ヨネがタワー射程ギリギリまで踏み込んだ瞬間、R(ワシの奢りじゃ!)をヨネの背後へ投げて自陣タワー下へ強制的に吹き飛ばし、タワーショットとEの1.0秒スタンを重ねて600Gシャットダウンを回収する
タワー前で不利な1v1の殴り合いを挑み、タワーの助けを得られずに再びソロキルされる
View authentic core spike timings, starter buys & runes for Gragas (Mid)
View authentic 0-90s starter buys, exact core power spike minutes, and situational rune setups directly from authentic Challenger OTP logs in the dedicated OTP Builds database.
Gragas: Definitive Spec, Physical Mechanics & Tactical System Master Guide
- Target Champion: Gragas (The Rabble Rouser)
- Primary Roles: MID / TOP (Burst Mage / AP Bruiser / Disruptor)
- Reference Patch: 2026 Season (Current Season Definitive Specs)
- Reference OTP: SloppyWalrus (`Sloppy#BOMB`) (EUW Challenger 1,732 LP / World-Class Mid/Top Gragas OTP)
Kit Specifications & Physical Parameters
① Passive: Happy Hour
- Effect: Instantly heals Gragas for 6.5% of his maximum HP every time he uses an ability.
- Innate Cooldown: 12 seconds (fixed at all ranks).
- Absolute Rule for Lane Sustain:
- Every time the 12-second passive cooldown resets, cast W (Drunken Rage: 30 Mana cost)—the most mana-efficient and lowest-risk ability—into empty space to continuously regenerate HP.
- SloppyWalrus voice commentary (vs. K'Sante match EUW1_7997438672): Even when dying at 10% HP, you can stay in lane without recalling by repeatedly casting W ("Gulp") the exact moment the passive comes off cooldown and disengaging with Stormraider's Surge.
② Q: Barrel Roll
- Range: 850 / Explosion Radius: 250 / Mana Cost: 80 / 75 / 70 / 65 / 60
- Fermentation Mechanic:
- Over 2.0 seconds from placement, damage and slow scale linearly from 100% to 150% (1.5x), remaining on the ground for up to 4 seconds (deals 70% damage to minions).
- Base Damage (Instant Detonation): 80 / 120 / 160 / 200 / 240 \; (+80\% \text{ AP})
- Max Fermentation Damage (After 2 Seconds): 120 / 180 / 240 / 300 / 360 \; (+120\% \text{ AP})
- Slow: 40 / 45 / 50 / 55 / 60\% (up to 60 / 67.5 / 75 / 82.5 / 90\% at max fermentation), lasting 2.0 seconds.
- Tactical Utility:
- Even an instant detonation applies a 2-second slow, making it useful as a component to trigger Stormraider's Surge's 25% HP threshold or to set up ganks.
- In the full burst combo ("Bomba" combo), pre-place Q at your feet or behind the target to ferment for 2 seconds, then use R (Explosive Cask) to knock enemies directly into it for a guaranteed 150% max damage (+120% AP) hit.
③ W: Drunken Rage
- Channel (Drinking) Time: 0.75 seconds / Mana Cost: 30 / Cooldown: 5 seconds
- Damage Reduction: For 2.5 seconds starting from the channel, incoming physical and magical damage is reduced by $10 / 12 / 14 / 16 / 18\% \; (+4\% \text{ per } 100 \text{ AP})$.
- Empowered Basic Attack ("Bluetooth Auto" Mechanic):
- Your next basic attack within 5 seconds of finishing the drink is empowered, dealing $20 / 50 / 80 / 110 / 140 \; (+70\% \text{ AP}) \; (+\% \text{ target's max HP } 7\%)$ area-of-effect magic damage to the target and surrounding enemies.
- [Most Important Physical Mechanic] +50 Range Extension (125 → 175) & Uncancellable Windup:
- The empowered AA has 50 more range than a normal attack, and once the windup starts, even if the enemy creates distance using Flash, blinks, Vladimir's W (Sanguine Pool), etc., it will hit them from afar (SloppyWalrus term: "Bluetooth Auto").
- Furthermore, Lich Bane's Spellblade damage (+75\% \text{ Base AD} + 40\% \text{ AP}) applies directly onto this empowered AA. This allows you to shred over 25% of the enemy's max HP and instantly trigger the keystone Stormraider's Surge (+40% Melee MS / 50% Slow Resist) using just a 2-action sequence of "E collision + W empowered AA" without even casting Q.
④ E: Body Slam
- Dash Range: 600 / Collision Radius: 180 / Knockback & Stun Duration: 1.0 second
- Damage: 80 / 125 / 170 / 215 / 260 \; (+60\% \text{ AP})
- Fixed 3-Second Cooldown Reduction on Hit:
- Upon colliding with an enemy unit (minion, monster, or champion), E's remaining cooldown is instantly reduced by 3.0 seconds.
- Dash Priority and "E-Flash" Guaranteed Mechanic:
- Gragas's E has a hit box extending further forward than his character model, giving it high priority to single-handedly shut down and stun many dash abilities (K'Sante W/E, Yone Q3, Jax Q, Lee Sin Q2, Camille E, etc.).
- E → Flash (Flash during Body Slam): Flashing during the E dash instantly shifts the collision hitbox (radius 180) to the Flash target coordinates, granting a guaranteed 1.0-second knockup and stun with zero reaction time for the enemy.
⑤ R: Explosive Cask
- Range: 1000 / Explosion Radius: 400 / Knockback Distance: 900 (forced displacement outward from the explosion center)
- Damage: 200 / 300 / 400 \; (+80\% \text{ AP})
- [Most Important Mechanic] Completely Fixed 0.55-Second Travel Time:
- Whether thrown at point-blank range (at his feet) or max range (1000), the time it takes for the barrel to land and explode is always locked at exactly 0.55 seconds.
- Therefore, throwing R while an enemy is locked in E (1.0-second stun) guarantees R will hit 100% of the time before they can press Flash or invulnerability skills, knocking them directly into a pre-placed fermented Q (2 seconds elapsed, 150% power) regardless of distance.
SloppyWalrus Signature "Bomba" In-Game Combo System
① Basic Trade (Stormraider's Surge 25% HP Chunk & Clean Disengage Combo)
$\mathbf{W \text{ (Pre-cast)}} \;\to\; \mathbf{E} \;(\text{+ Sudden Impact}) \;\to\; \mathbf{W \text{ Empowered AA (Bluetooth Auto)}} \;(\text{+ }\mathbf{Q} \text{ if needed}) \;\to\; \text{Trigger "Stormraider's Surge" (MS+40%) at 25% Max HP chunk & Disengage}$
- Cast W 1 second before engagement to gain damage reduction and charge the empowered AA (7% target max HP + 70% AP + Lich Bane Spellblade).
- E into the enemy to apply a 1.0-second stun while simultaneously triggering Sudden Impact and Scorch.
- During the stun, unleash the W Empowered AA (Bluetooth Auto) (and add foot-placed Q early on if needed) to deal 25% of the enemy's max HP in damage within 3 seconds, activating Stormraider's Surge (+40% Melee Movement Speed & 50% Slow Resistance for 3 seconds) to cleanly disengage outside the enemy's retaliatory range.
- [Crucial Difference from Old Phase Rush (Patch 26.9 Onward)]: No longer requires 3 separate attacks; triggers based on damage amount (25% max HP). Once Lich Bane is completed, Movement Speed +40% reliably triggers with just a 2-hit sequence of "W pre-cast → E → AA" while holding Q.
② Guaranteed One-Shot "The Bomba Combo" (Fermented Q Insec)
$\mathbf{W \text{ (Pre-cast)}} \;\to\; \mathbf{E} \;(\text{or } \mathbf{E \to \text{Flash}}) \;\to\; \mathbf{Q \text{ (Place behind/aside - Do Not Detonate)}} \;\to\; \mathbf{R \text{ (Throw behind enemy)}} \;\to\; \mathbf{W \text{ Empowered AA}} \;\to\; \mathbf{Q \text{ (Max Fermentation 150% Detonation)}} $
- After pre-casting W, use E (or E → Flash) to stun the enemy for 1.0 second.
- The instant they are stunned, place Q in the direction you want to displace them (toward your team or to the side) without detonating it yet.
- Without a moment's delay, throw R behind the enemy and strike them with a W Empowered AA.
- 0.55 seconds later, R explodes, forcing the enemy directly into the dead center of the 2-second fermented Max Power Q (150% damage: +120% AP) for an instant kill.
SloppyWalrus (Sloppy#BOMB) Official Riot API 35-Match Statistics & Twitch Archive Voice Tactical System
① Official Riot API Match-v5 / Timeline-v5 Raw Log 35-Match Statistics Summary
- Data Target: [knowledge/gragas/matches/](file:///d:/Antigravity/LOL/knowledge/gragas/matches) & [knowledge/gragas/timelines/](file:///d:/Antigravity/LOL/knowledge/gragas/timelines) (Pure Gragas 35 matches, Win Rate 57.1% [20W 15L] / Role Breakdown: MID 24 matches, TOP 5 matches, BOT 4 matches, JG 1 match, SUP 1 match)
- Latest Core Item Pick Rates (Sloppy's "Lost Chapter Stop → Lich Bane + Shadowflame" Full Burst Build):
- `3100` Lich Bane: 32 / 35 matches (91.4%) — Absolute 1st Core. Applies Spellblade (+40% AP), Ability Haste, and +8% MS to the W Empowered AA (Bluetooth Auto), creating a structure where E + W Empowered AA alone shreds 25% of the enemy's max HP to instantly trigger Stormraider's Surge.
- `4645` Shadowflame: 31 / 35 matches (88.6%) — Absolute 2nd Core. Magic damage crits for 120% against targets below 40% HP, ensuring the Fermented Q + R Bomba combo guarantees a one-shot on enemy carries.
- `3802` Lost Chapter Stop (1,200G): 21 / 35 matches (60.0%) — [Sloppy's Biggest Build Characteristic] After buying 'Lost Chapter (1,200G)' on the 1st recall to secure mana regen on level-up and haste, do not upgrade into Luden's or Blackfire Torch; keep it as Lost Chapter and rush directly into 'Lich Bane (3100) → Shadowflame (4645)'. This solves mana issues while acquiring one-shot damage at maximum speed.
- `3175` Sorcerer's Shoes (Tier 3: 62.9% [22/35]) + `3020` Sorcerer's Shoes (20.0% [7/35]): Total 82.9% (29/35 matches) utilizing magic penetration boots.
- `3089` Rabadon's Deathcap: 16 / 35 matches (45.7%) (+ Needlessly Large Rod 1058 held in 14 matches).
- `4646` Stormsurge: 12 / 35 matches (34.3%) / `1082` Dark Seal: 12 / 35 matches (34.3%) (evolved into `3041` Mejai's in 5 of those matches).
- Rune Selection Statistics (35 matches / 2026 Season 2 Patch 26.9 Specs):
- Primary Keystone:
- `8230` Stormraider's Surge: 34 / 35 matches (97.1%!) — Sorcery keystone returning in Patch 26.9 to replace Phase Rush (Deals 25% max HP damage to an enemy within 3 seconds to gain +40% melee MS & 50% slow resist for 3 seconds, CD 20–10s). Nearly every match across MID and TOP fixed-runs Stormraider's Surge + Manaflow Band + Transcendence + Scorch.
- Secondary Paths (Top 2 Factions):
- `8000` Precision (Presence of Mind + Legend: Haste): 22 / 35 matches (62.9%) — Standard setup for matchups against tanks/fighters or longer fights to maintain mana and E rotation speed.
- `8100` Domination (Sudden Impact + Treasure Hunter): 12 / 35 matches (34.3%) — Setup heavily praised and frequently used by Sloppy himself on Twitch stream (`v2886183912`). Every time Body Slam (E) hits, Sudden Impact's bonus true damage and Scorch trigger simultaneously, serving as the core synergy to break the 25% enemy max HP threshold and reliably activate Stormraider's Surge (MS+40%) with just "E + W Empowered AA" even at low early-game AP.
- Summoner Spells: Flash + Teleport `(4, 12)` in 33 / 35 matches (94.3%).
② Twitch Stream Archive (v2886183912) Voice-Recorded Matchup Micro & Macro Discipline
- Rule of Thumb for Level 1 Skill Choice (vs. Lock-in / Hard Melee Matchups — `EUW1_7997449593`):
- Sloppy Voice: *"Yeah, I don't get to play, I need to start Q man. Gragas can't play with E start. Fucking useless... And now I go W though."*
- Discipline: Taking E (Body Slam) at Level 1 against heavy Level 1 melee brawlers (Sett, Yasuo, Darius, Tryndamere, etc.) or ranged mages means you will lose the trade and be unable to touch minions after dashing in. Always start Q (Barrel Roll) at Level 1 → take W (or E) at Level 2, collecting CS and Manaflow Band stacks from a distance.
- vs. Vladimir (`EUW1_7997454404` & `EUW1_7997460647` [2-0]):
- Sloppy Voice: *"I like these runes: Sudden Impact and Scorch. Adds a lot of chip damage anytime you damage something... Not a good recall, but I think we take it so that I'm healthy if there's a fight mid... Bluetooth auto! Oof, nice!"*
- Discipline:
- Select Stormraider's Surge + Scorch + Sudden Impact, then execute W load → E collision → Bluetooth Auto (W Empowered AA) to chunk 25% max HP, instantly triggering Stormraider's Surge (MS+40%) to disengage cleanly before Vladimir can fire back with empowered Q.
- Even if Vladimir tries to escape using W (Sanguine Pool), pre-initiating the W empowered AA windup ensures "Bluetooth Auto" tracks him into his pool and hits where he reappears.
- Even if wave state is imperfect, take a tempo recall (or Fast TP) to maintain full HP if you get chipped before a mid/river fight.
- vs. K'Sante & Tank TOP (`EUW1_7997438672` [WIN]):
- Sloppy Voice: *"Nice, I stopped his auto... I'm 1 HP, gulp."*
- Discipline: Layer E (Body Slam) right as K'Sante tries to cast Q3 or weave passive AAs to cancel his basic attack animation and dash. Drink W to regenerate 6.5% HP every time the passive (Happy Hour) comes up, and kite him out using W's max HP 7% magic damage and Stormraider's Surge once Lost Chapter + Lich Bane are complete.
- vs. Yone (TOP/MID — `EUW1_7997501503` [11/2/2 WIN, 2 Solo Kills]):
- Discipline: Gragas's E (Body Slam) wins priority against Yone's Q3 (knockup dash). Meet Yone's approach with E the moment he charges in to stun him, chunk 25% max HP with W Empowered AA + Q, and use Stormraider's Surge (MS+40%) to get out of Yone's E range. From Level 6 onward, use Lost Chapter + Lich Bane damage to combo E-Flash → R → Fermented Q (Bomba) on Yone's return E mark or main body, farming 1,000G shutdown solo kills.
- vs. Orianna / Ahri / General Mages (`EUW1_7997477758` [10/4/10 WIN]):
- Discipline: Early on, use Doran's Ring + Q to clear minions and hit the enemy mage simultaneously, cycling W every 12 seconds for passive sustain against poke. Recall immediately at 1,200G for Lost Chapter and TP back. Post-Level 6, coordinate with your Jungler's approach or punish missed enemy abilities with E-Flash → R to knock low-mobility mages into your team for guaranteed kills.
Compare your recent Gragas (Mid) match against SloppyWalrus (Gragmaster)'s Challenger telemetry
Enter your Riot ID below. Our AI extracts your 1-minute Riot Timeline coordinates, identifies critical death incidents, and prescribes exact fixes.
Knowledge Freshness & Community Feedback (Gragas (Mid))
Keep our OTP database fresh! Report outdated mechanics or submit cutting-edge specialist combos.
Community Freshness Feed
Submit the first report to help maintain this OTP doctrine's freshness.